Dear Customer,
When Mutoh is distributing new FW versions it is important that these versions are uploaded on the printers as soon as possible. New FW versions may contain, next to important bugfixes and/or changes, new features that can improve the performance of the printer.
However, we understand it is not always feasible to travel to all installed units to upload the latest FW versions.
Nevertheless, this should not be an obstacle because end-users/operators can do this job themselves by means of the MSM tool.
1/ Download the MSM:
The MSM can be downloaded from:
- the Mutoh Club for end-users (https://club.mutoh.co.jp/mutoh/guser/)

- the Mutoh Club for dealers (https://mutoh-club.com/mutoh/user/)
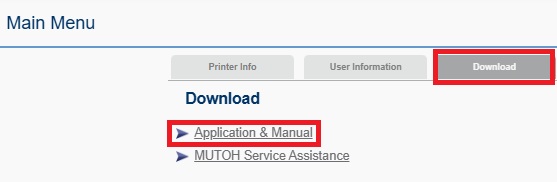
Note: In case the end-user is not able to download the MSM himself please forward it to him/her via a zip file.
2/ Install the MSM:
1/ The installer for the MUTOH Status Monitor (MSM) is compressed in a zip format, so please unzip it to a suitable folder.
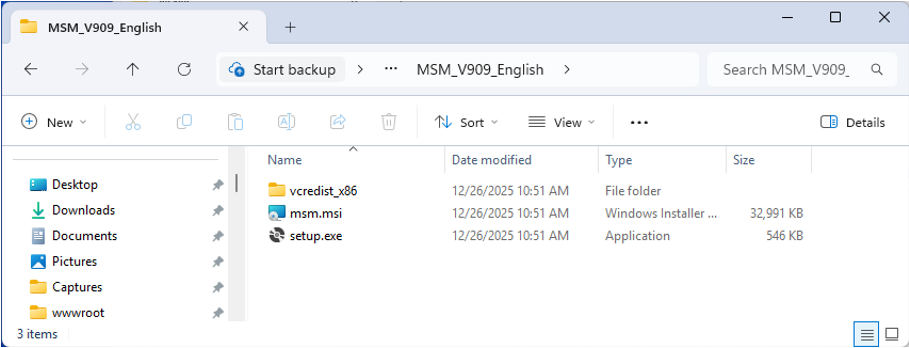
2/ Run the "setup.exe" file from the MSM installer file.

3/ Follow the wizard by clicking the "Next" button to proceed.

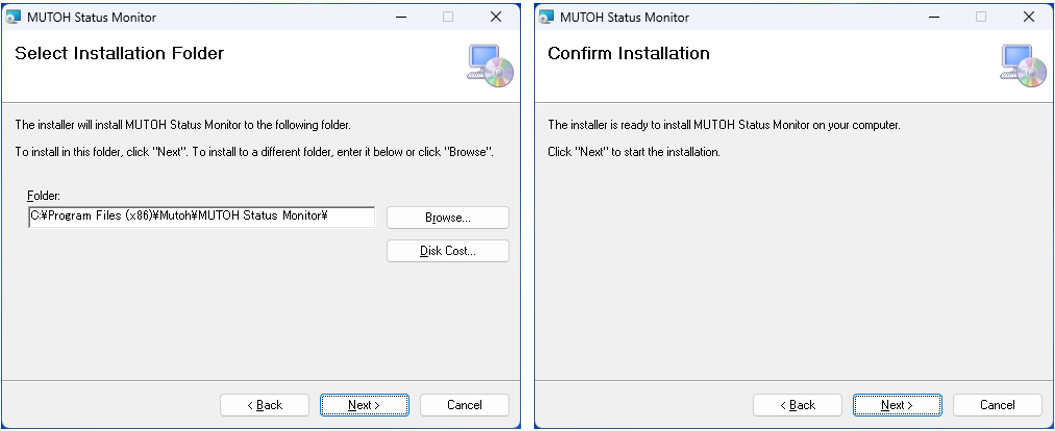
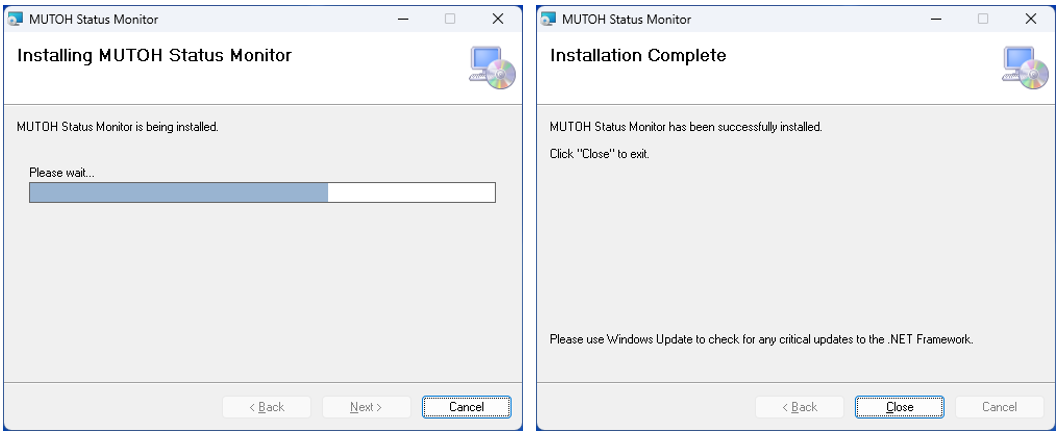
4/ Once the installation is complete, an MSM icon will appear on your desktop.
3/ MSM Set-up:
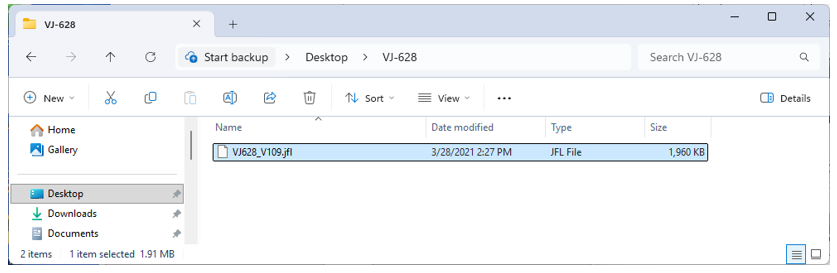
Note: Make sure to have the firmware data file (*.jfl) available on the PC.
Procedure
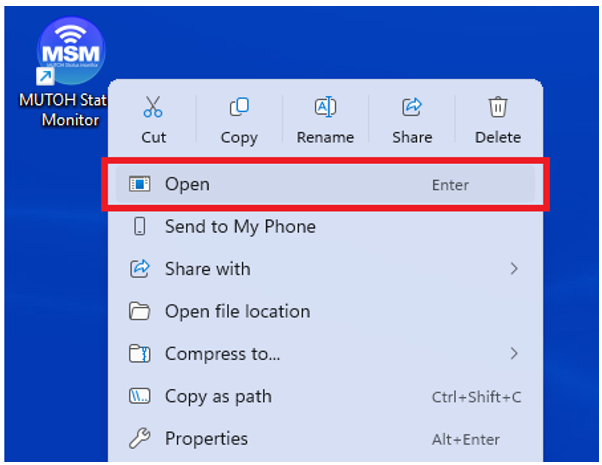
1. Launch the SMS icon on your desktop.
2. The setup wizard screen will appear, press the "Start" button.
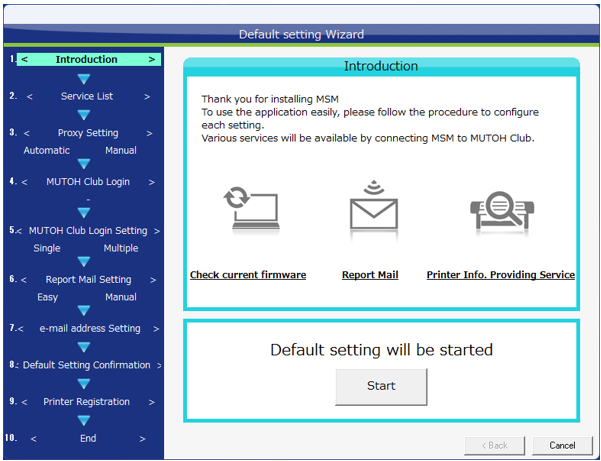
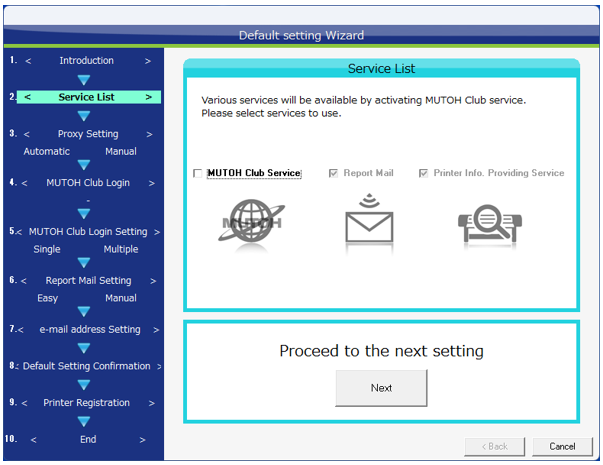
3. A screen for selecting the services provided will appear.
Uncheck the MUTOH Club service and press the "Next" button
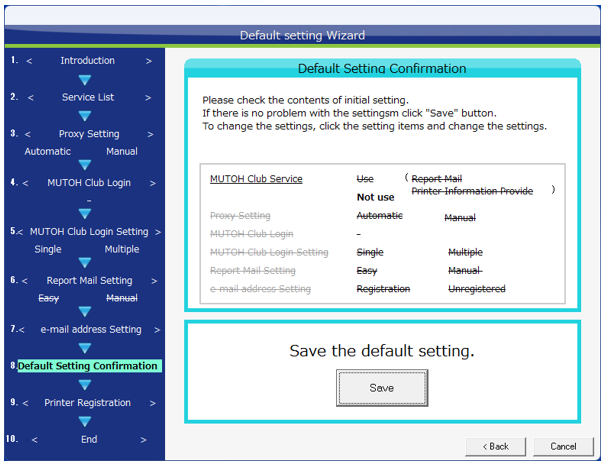
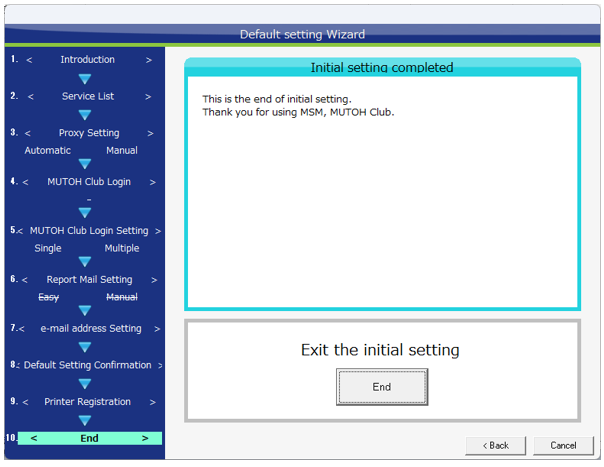
4. The initial settings will be displayed, press the "Save" button.
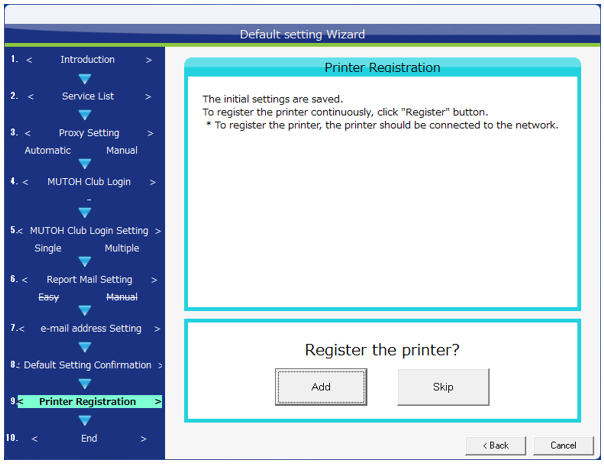
5. Proceed to printer registration. Press the "Add" button.
6. The printer registration screen will appear, select the "Add" icon at the bottom left of the screen.
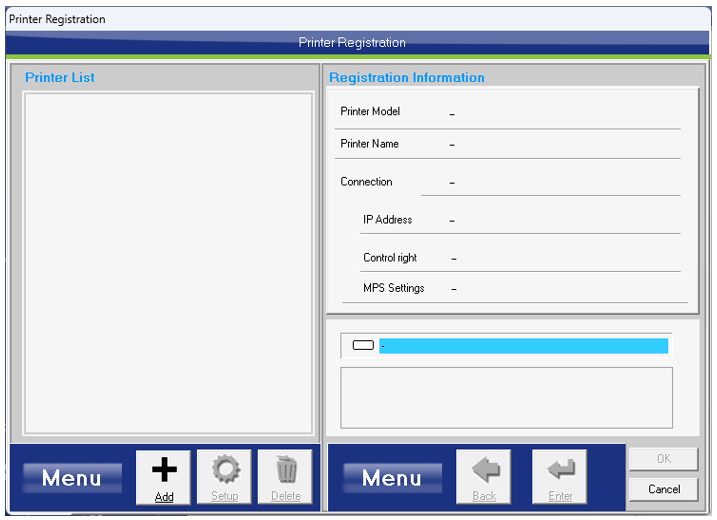
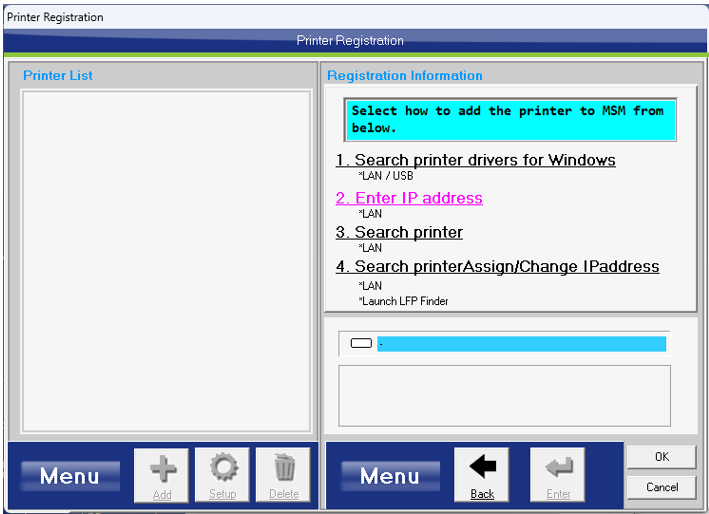
7. Select how you want to register the printer.
In this example, we will register the printer by entering its IP address, so select "Enter IP address."
(Please check the IP address registered to the printer beforehand.)
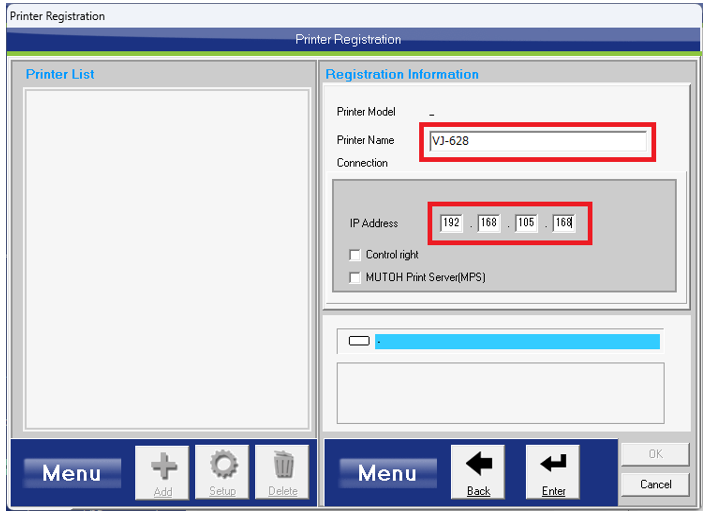
8. Enter the name of the printer you want to register (any name) and the IP address set for the printer, and press the "Enter" button.
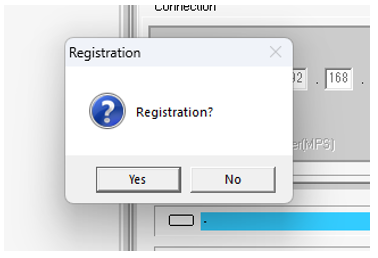
9. In the message box, press the "Yes" button.
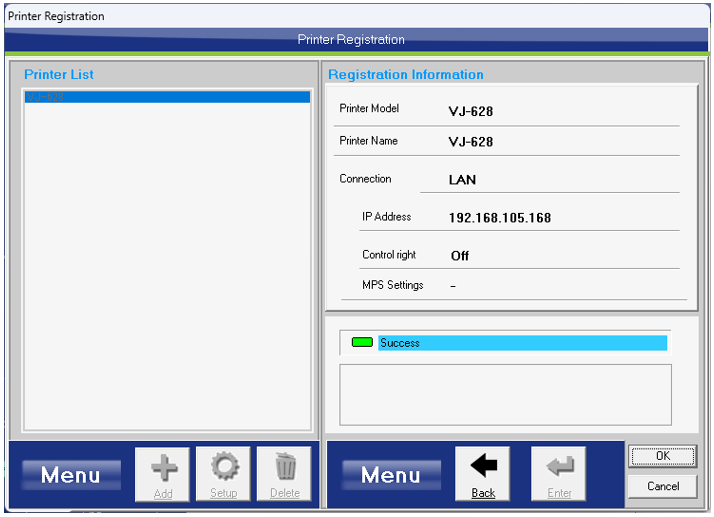
10. Once the printer is registered, it will be displayed as shown in the screen below.
Press the "OK" button at the bottom right of the screen.
11. This completes the setup. Click the "End" button.
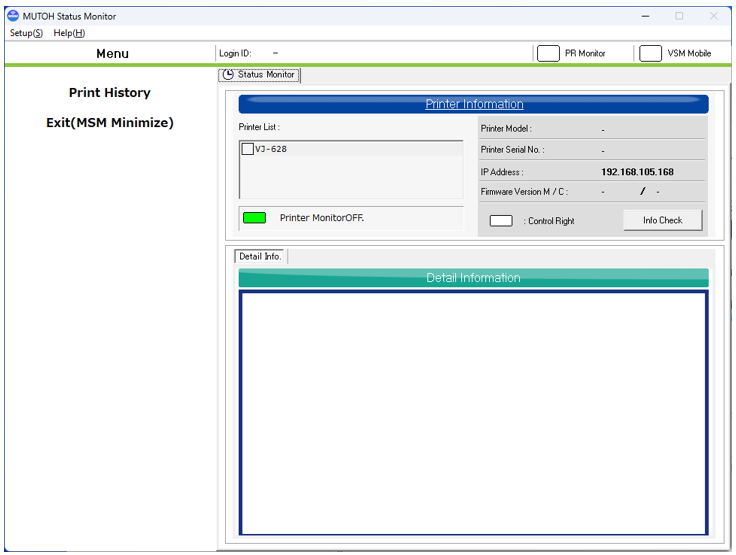
12. The MSM main screen will be displayed.
(Please make sure the printer is registered to be able to instal FW)
4/ Installing th Firmware:
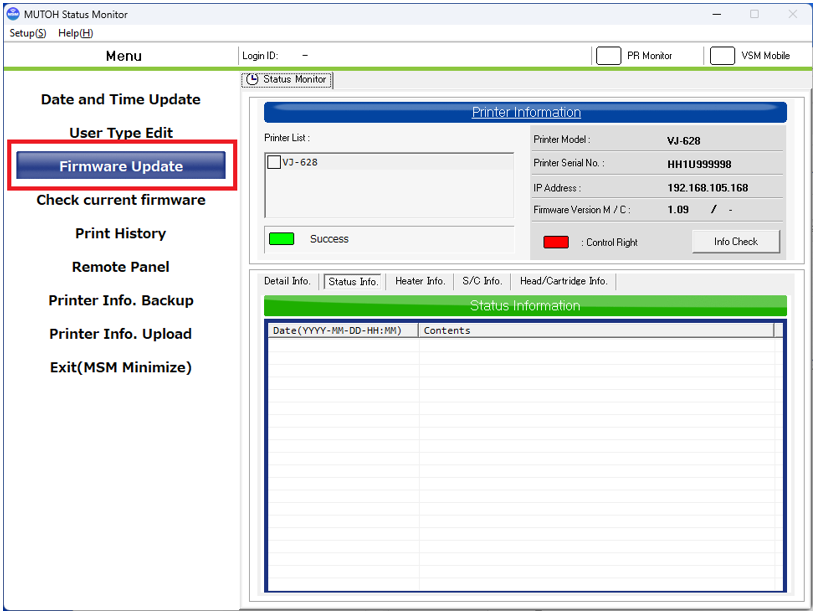
1. Click on the printer in the red frame on the MSM main screen to display the "Menu" on the left side of the screen.
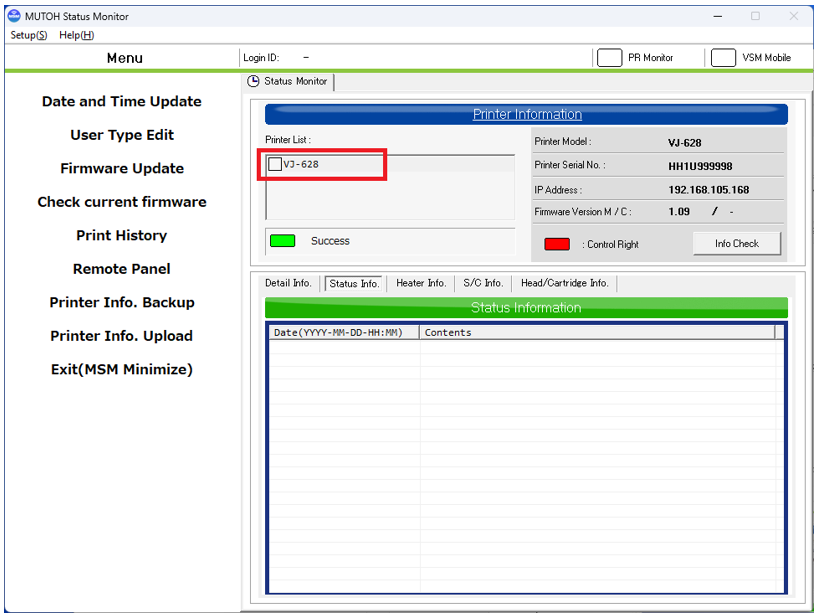
2. Select the "Firmware Update" button.
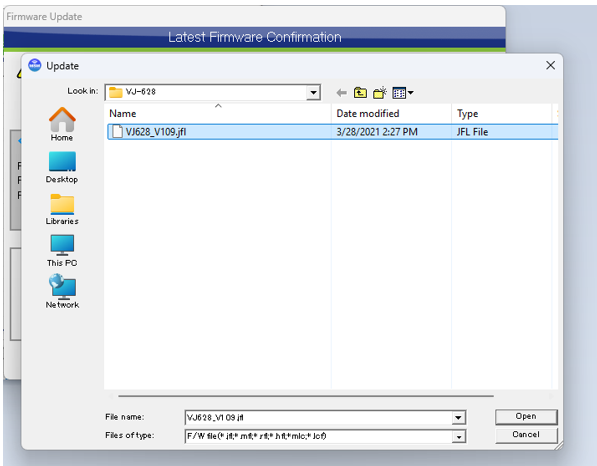
3. A file selection screen will appear, so select the firmware file you want to install and press the "Open" button.
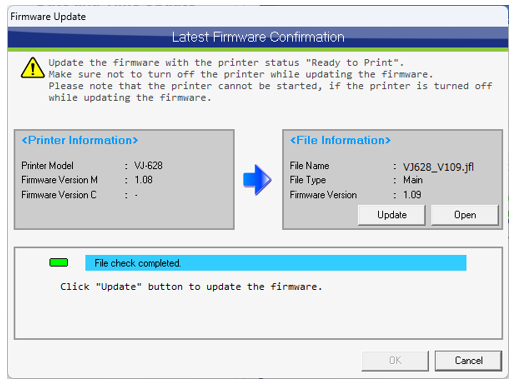
4. Press the "Update" button to start the firmware update.
The printer will enter firmware update mode.
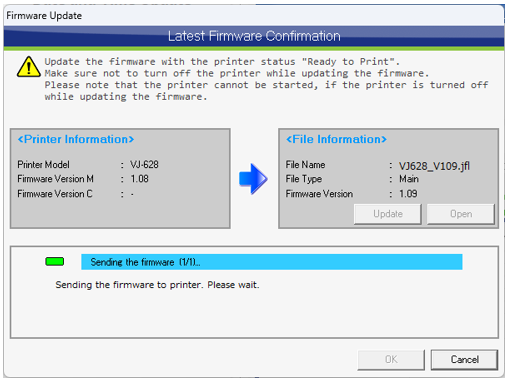
5. Once the printer has entered update mode, the selected firmware data will be sent to the printer.
6. Once the firmware file transfer is complete, the firmware update will begin.
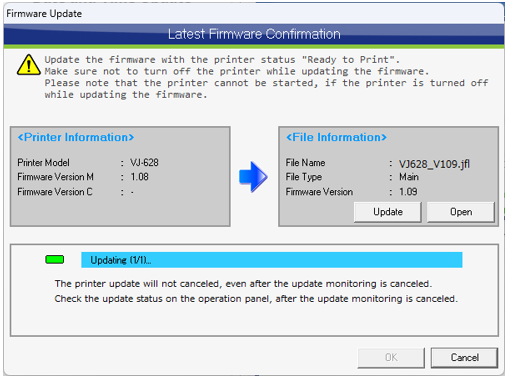
7. Once the firmware update is complete, click the "OK" button to complete the firmware update.
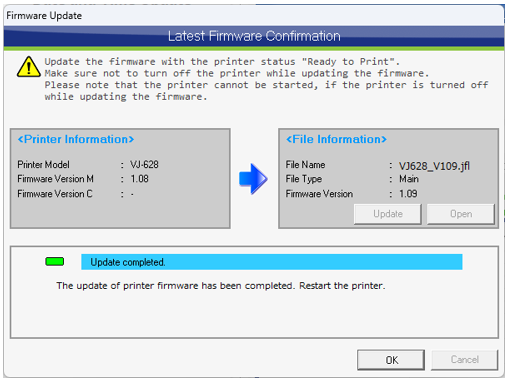
Notes:
* The firmware update may take several minutes. Do not switch off the printer or unplug the AC cable during the update.
* The printer will remain in update mode even after the firmware update is complete. Please restart the printer.
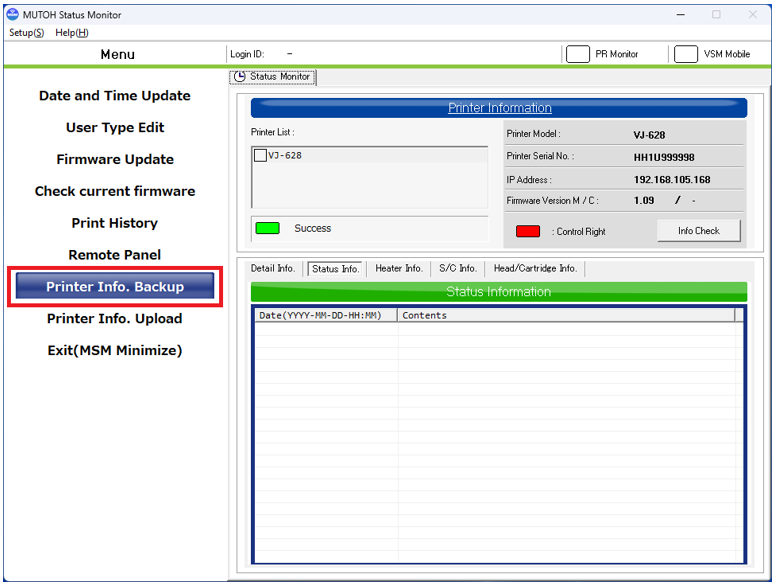
5/ Backing up Printer information:
Get your printer information to confirm that the firmware has been updated.
1. Select the "Printer Info. Backup" button.
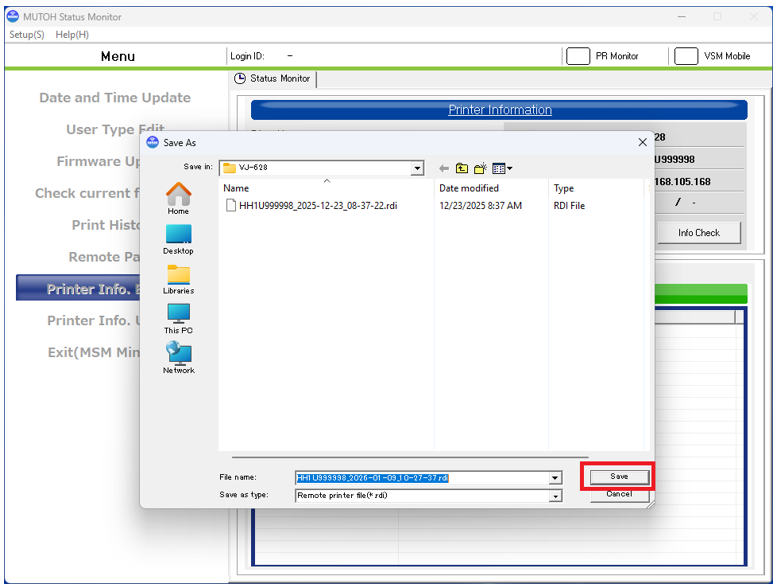
2. Select the "Save" button.
Printer information will be downloaded from the printer and saved to a file. Save it to your local PC without renaming it.
The printer firmware update process is now complete.
Was this article helpful?
That’s Great!
Thank you for your feedback
Sorry! We couldn't be helpful
Thank you for your feedback
Feedback sent
We appreciate your effort and will try to fix the article